Because there are no commercially produced LEGO Ninjago party decorations, we had to cobble ours together from many different sources. I also got tons of ideas from various places around the web. I googled LEGO party, ninja party, and Ninjago party. I also pinned a bunch of ideas on Pinterest. Check out my LEGO Ninjago Party Ideas Pin Board here. Below is the list of ideas that we used, links to where I got those ideas, how I modified the ideas to work for us, links to the products we used (no affiliation, just a happy customer), and some general instructions on how I did a few things that I've been asked quite frequently. I hope you find it helpful. If you have any specific questions or comments, please feel free to contact me: erinmarie AT rocketmail DOT com
Invitations

These invitation are my own design, based on the "ninja eyes" theme of Ninjago.
Materials: blank white folding cards and envelopes (cards should be larger than 4x6 when folded; mine were 5.5 x 6.5 inches), white and colored card stock (official Ninjago ninja colors are red, white, black, blue, and green, but I also made purple ones just for my nieces), pencil, black marker, hole punch, white school glue, glue dots
I bought a pack of blank white cards and envelopes from Michael's. I believe they are about 5.5x6.5 inches when folded. I also bought some colored card stock strips that were 4x12 inches and cut them in half. That gave me the rectangular color pieces for each ninja. I used this image of "ninja eyes" for the shape of the "mask" and eyes. I used Microsoft Word to scale the image so that the mask portion was about 5 inches wide (turn on the ruler view), then printed it. I used that to trace a card stock template of the mask opening (the yellow part), and I traced the template onto yellow card stock. (Use a light box (or hold it against the window, like I did) so the shape shows through the card stock.) I could get 4 masks on a single 4x12 inch strip. I cut them all out, then traced the eyes onto the yellow cut out shapes (again using a light box or window), then outlined and filled with black permanent marker. I used a standard hole punch for the white eye circles and attached those with regular white school glue. I used a black marker on the edge of the yellow eyes, just to give the mask opening a tiny bit of extra definition. Then, I attached the yellow to the color block and the color block to the front of the card using medium glue dots. (I'd never used glue dots before, but they were awesome!) For the card interior, I printed pages with the party information and used glue dots to secure them inside. They were fairly simple, just time consuming.
Decorations

These decorative posters came from this official LEGO link, so they are both legit and legal. When you get to the site, click on each of the characters, click the poster button, and download the PDF. The characters with posters are: Kai, Jay, Cole, Zane, Nya, Sensei Wu, The Samurai, Lord Garmadon, Lloyd Garmadon. There is also a group poster of the 4 ninja in their tornadoes surrounding Lord Garmadon. I saved them all onto a jump drive, then took that to Office Depot and had them printed on 11x17 card stock.
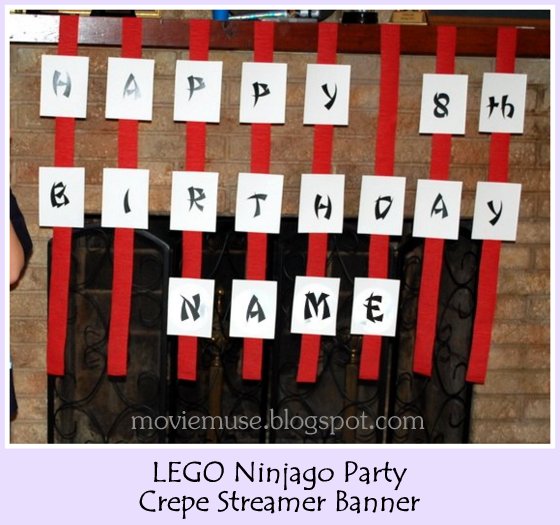
This banner was my mom's idea. I made the letters in Microsoft Word. The font I used is called Wonton, available for free at dafont.com. I made the page 2 columns. I increased the size of the font to something around 200, I believe, basically as big as it could get and still fit four letters to a page. I printed it as a PDF, then took that on a thumb drive to Office Depot and had them printed on 8.5x11 card stock. I cut the letters apart (cutting each page of 4 letters into 4 equal rectangles) and used glue dots to attach them to 8 strips of crepe streamers. (Remember, the streamers are vertical, but the words are read horizontally. So streamer one has the H and the B; streamer 2 has the A and the I; streamer 3 has the first P, the R, and the L; etc.) I then taped the streamers to the fireplace mantle, spacing them as evenly as possible and lining up each row of letters as carefully as possible.
For instructions on how to download and install a font, please see this excellent post by Over the Big Moon.
Party Food
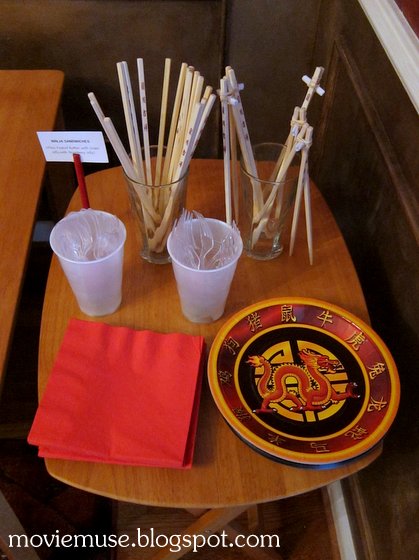
The Chinese New Year dragon plates came from The Oriental Trading Company. The chopsticks came from Sur la Table. Cups, plastic ware, and napkins were from the dollar store (and the blue tablecloth on the main table).
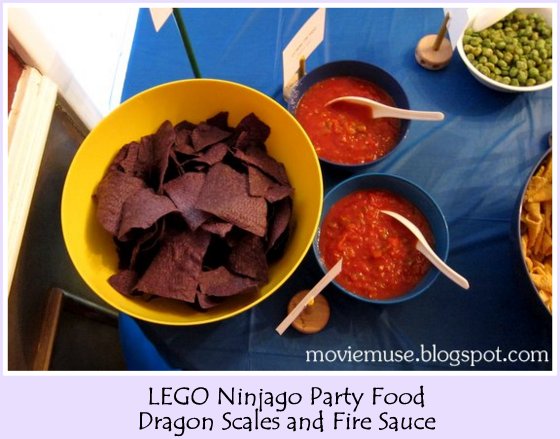
Dragon Scales and Fire Sauce - This was my idea. Everyone seems to love chips and salsa, and I love the look of these blue corn tortilla chips. They really do remind me of what I think dragon scales would look like. We served mild and medium salsa.
The food labels were made in Microsoft Word (paper turned landscape, three columns, plenty of space between each, printed on card stock and cut apart). The holders are just Tinkertoys. We used some extra scrap card stock to make it thick enough for the slot in the Tinkertoy "bar" to hold tightly enough. The white Japanese soup spoons came from Amazon.
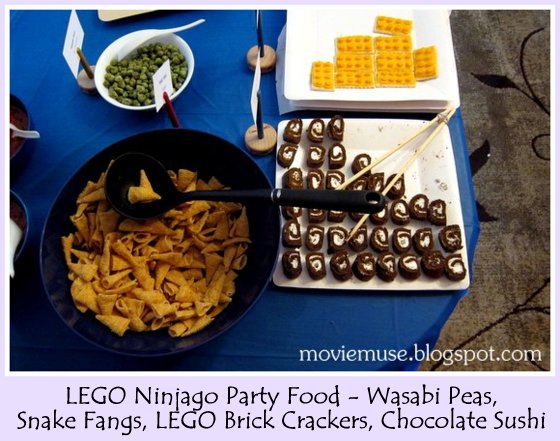
* Wasabi Peas - These came from the DeKalb Farmers Market. (I wanted to try edamame, but I didn't want to try to make it for the first time for a party.)
* Snake Fangs - I got the idea for using the Bugles from a website that no longer exists. She used them for "dino toenails," but when I saw them, I immediately saw snake fangs. Since the Snake Clans are the enemies of the Ninjago ninja, I thought it was a great idea.
* Chocolate Sushi - This idea came from Nothing But Country (she has some other cute sushi ideas there, too). We just sliced each cake into (I think) 4 pieces.
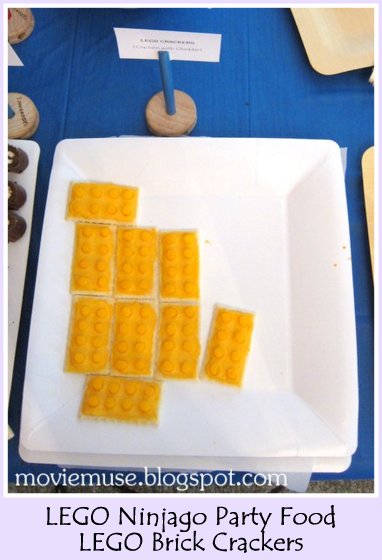
LEGO Brick Cheese Crackers - These were inspired by the ones at Pure Joy Events, but I did mine differently. I used a McDonald's straw (they are larger in diameter than standard straws) and cut off a 1-1.5 inch length. I used that to cut out the circles (yes, one by one; yes, it was very tedious). The problem, of course, was how to get the cheese out of the straw. I *tried* using a standard straw to press the cut circles out of the larger straw, but that didn't work. The smaller straw just went through the cut cheese and shredded it. Instead, I used an unsharpened pencil (my dad's idea). The flat end was the perfect diameter. I did cover the end of the pencil with plastic wrap so it wouldn't get graphite on the cheese. That gave me a bowl full of little cheese pips. Then I spread each Club cracker with cheese spread (I used Kaukauna brand) and placed the pips. For even distribution of the pips, I found it easier to place the corner pips, then evenly space the remaining pips in between.
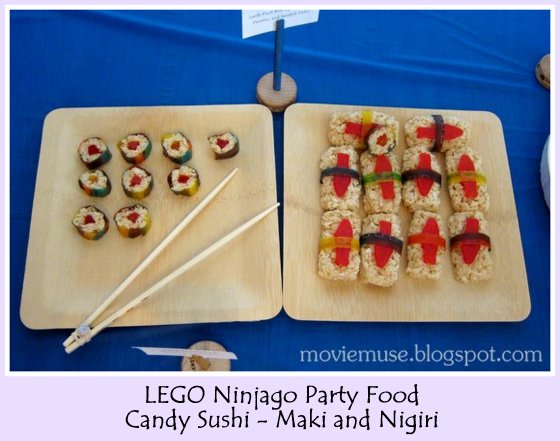
The Candy Sushi idea came from Mommy Knows, though I have seen it several places. We used gummy worms inside the maki rolls (no Twizzlers), and we used Swedish fish on the nigiri. The Berry Tie Dye flavor of Fruit Roll-Ups and Fruit By The Foot are the ones with the green and blue colors. The Fruit By The Foot comes off the waxy paper fine, though it easier to cut into strips (long enough to go around your nigiri roll) and then cut the strips in half lengthwise before removing it from the paper. I had trouble unrolling the Fruit Roll Ups, though. Tip: refrigerate them! And work fast once you pull them out. They warm up and get sticky and unwieldy in a hurry. I actually refrigerated them, unrolled them, put them back in the refrigerator for about an hour once they were flat, then took them out one at a time to roll around the krispies. Refrigerate again, then cut using a very sharp knife. Also, I suggest lining the plate (or whatever you are serving from) with parchment paper, otherwise the fruit wrappings will stick to the plate (ask me how I know).
These great bamboo plates are from Party City. Very sturdy, but very light, and completely biodegradable.
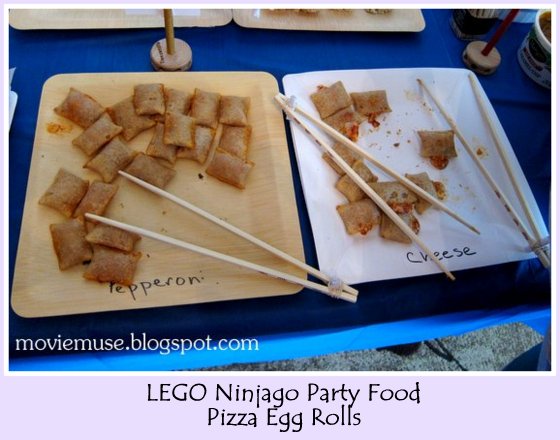
Pizza Egg Rolls - These were just Totino's Pizza Rolls, baked in the oven.
Ninja Sandwiches (not pictured) - I also made plain peanut butter sandwiches and peanut butter and jelly sandwiches, cut into quarters. (I wanted to make PB&J sushi as shown at Shine by Yahoo, but they were very fiddly and didn't cut cleanly, so they weren't very pretty. Plus they took a long time for not much yield.)
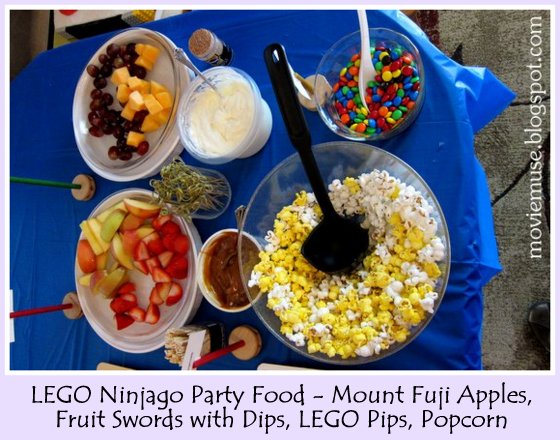
* LEGO Pips - Plain M&Ms, the most popular item at the party!
* Popcorn - Luke's one food request (besides cake); couldn't think of a Japanese or ninja related name to call it. We tried several brands and liked the Kroger store brand best. We used a mix of the salted and the movie theater butter.
* Fruit Swords - Sliced fruit (grapes, cantaloupe, strawberries) with cool bamboo picks (found on Amazon). To keep the fruit cold, I froze about 1/4 inch of water in the bottom of a pie plate. I put the fruit in a second pie plate and set it on top of the frozen one.
* Mount Fuji Apples - Fuji apples, cored/sliced, soaked in Sprite to prevent browning.
* Caramel Dip - This was premade Marzetti brand. It is refrigerated; I found it in the produce section. I would have preferred to make my own, but I didn't have time.
* Marshmallow Cream Cheese Fruit Dip - A recipe we've loved for years in my family. Mix 8 oz softened cream cheese with one 7 oz jar of marshmallow fluff (we like Kraft Jet Puffed brand) until well blended. Refrigerate. Serve with fruit of choice. We love it with apples, especially Granny Smiths.
Party Games and Activities
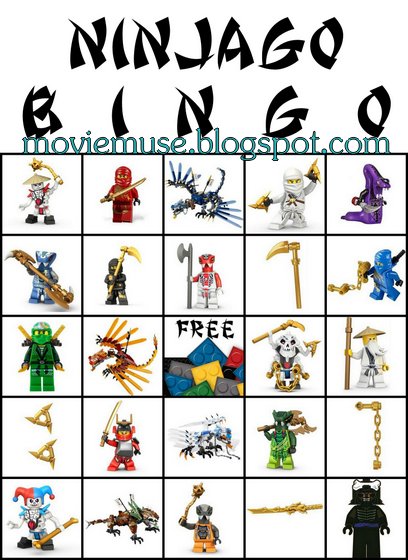
These bingo cards were my creation, though I got the idea from How to Cook That. I just googled the various different characters and downloaded images I liked as I found them. One of the best resources for images was ninjago.wikia.com. Please note that it *is* legal for you to download the images and use them for yourself to make bingo cards (or anything else) for your own personal use. It is NOT legal for you (or me) to put those images in a zip file and make it available on a blog or website, even for free. That is illegally distributing someone else's images and is a violation of copyright law. It is also illegal to make bingo cards (or anything else using those images) and sell them (or give them away) without express written permission from the legal copyright holder, in this case probably both the LEGO company and whoever took/made the image. Making money off someone else's images is very much illegal. (Yes, I know people are doing it all over Etsy. It is still illegal!) So that's why I can't give you the images I used, nor can I give/sell the bingo cards to you. Sorry!
I had to make a "free" square myself using a "building brick" digital scrapbooking kit I purchased: Some Assembly Required by Libby Pritchett, available at Sweet Shoppe Designs. Again, it was made from someone else's images, so I can use it for myself, but I can't give it to you without her permission. The font I used is called Wonton, available for free at dafont.com.
Once you have all of your images, square them up, and save the square versions all in one folder, with nothing else in it. You need 25 total, including your free square. You can have more, just not fewer. Then use the collage function in Picasa (free Google image software). You can drag and drop the squares so that the free one is in the middle. Then just keep shuffling/rearranging the squares. Save each version when you're done. Make as many as you need. Now, paste those 5x5 grids into a word processing program, add the title, and print. I actually printed mine in PDF, then took them to Office Depot and had them printed on 8.5x11 card stock. We used pennies for markers, but LEGO bricks would be really cute, too (if you have enough to go around).
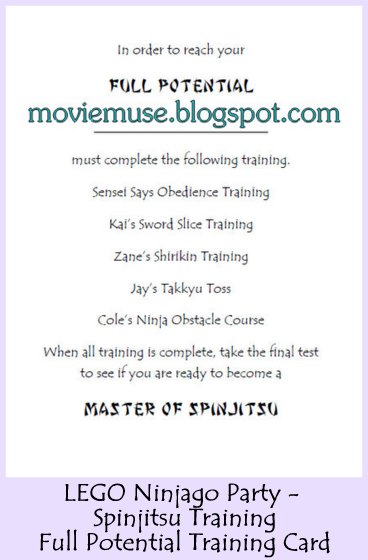
This card was made in Microsoft Word, four to a page (two columns). Most of the text is in a free font called Tempus Sans, available at fontzone.net. The rest is a free font called Wonton, available at dafont.com. I had them printed on 8.5x11 card stock at Office Depot, then cut them apart into 4 equal size cards. We used small foil star stickers from Target to mark when each item was complete.(Please ignore the fact that I misspelled shurikin.)
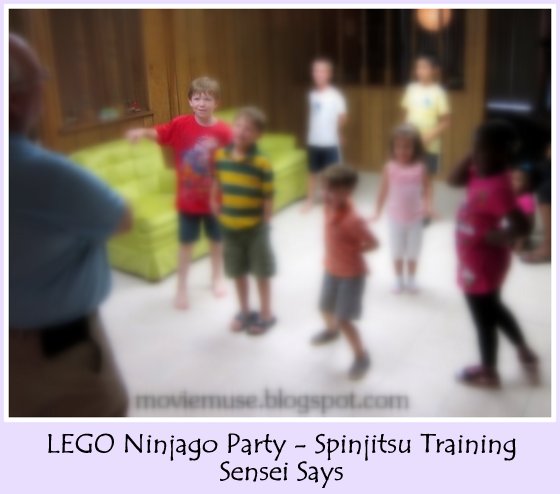
Sensai Says Obedience Training - This game idea came from nateandsan.com. I absolutely loved the idea when I saw it. So simple, but makes so much sense! I was afraid the older kids would think it was lame and/or a "baby game," but everyone absolutely loved it.

Kai's Sword Slice Training - This game was mostly Luke's idea. I needed a sword game (preferably something besides the kids hitting each other) and he suggested Fruit Ninja on the phones. I didn't want to give the kids our phones, but it did remind me that there is a similar game on Wii Sports Resort. In the Speed Slice, an object drops down in front of you. You must then slice it in the direction indicated before your opponent, which earns you a point. The first to 10 points wins. Each kid got to play to 10 one time against the computer, not each other. Win or lose, they had to pass it off to the next person for the next round.
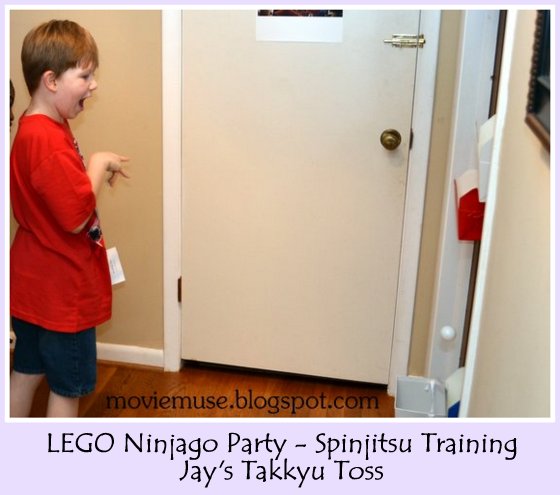
Jay's Tekkyu Toss - The original idea for this came from the anderstuff.com website, but I ended up doing my own thing with it. Tekkyu is Japanese for ping pong. She had the kids throwing fortune cookies into the take out containers; we switched to ping pong balls (reusable and less expensive). I ordered my ping pong balls cheaply from Amazon, but I also later discovered them at the dollar store. The take out containers also came from the dollar store, and we secured them to the slatted door using pipe cleaners.
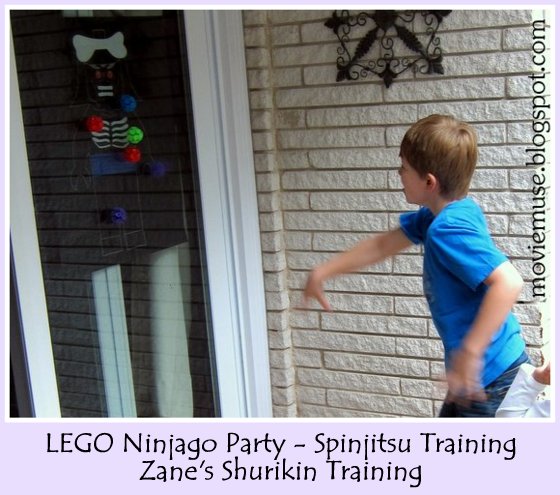
Zane's Shurikin Training - The original idea for this also came from the anderstuff.com website, but I really changed this one up. She used actual rubber throwing stars and aimed at a very large sheet of paper. We used the suction cup balls from Party City thrown at our sliding glass doors (which are made of gorilla glass, BTW; we would NOT have attempted this with our previous very fragile glass doors), and I made my own target:
Lord Garmadon Poster
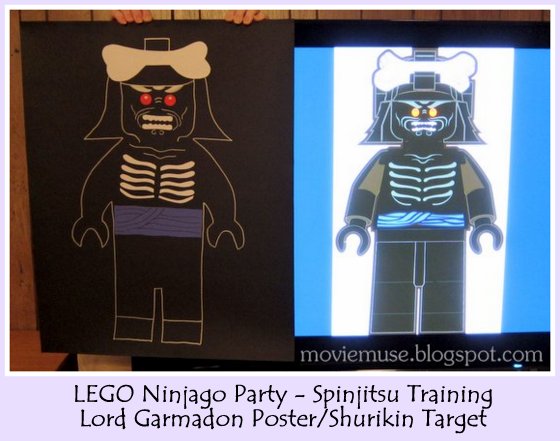
Materials: black poster board (approximately 22x28 inches), white paper or tracing paper, pencil, scissors, white card stock, red card stock, blue card stock, glue stick, coins, silver Sharpie (or other silver pen/marker/paint pen)
I made this poster myself. I used this Garmadon minifig image from NinjagoWiki and displayed it on my television (right). I did have to convert it from a .svg file into a .png, but I used a free online image converter to do that. I taped some regular printer paper together so I could trace the image at the proper scale. This didn't work as well as I hoped because there is a gap between the front glass on the television and where the actual image is displayed, which only provides a fuzzy outline to trace. It would have been easier with actual tracing paper. Still, it worked well enough to get the general silhouette. I then cut that out and traced it onto the black poster board lightly with pencil, then went over it with a silver Sharpie marker. I drew the head bone, ribs, and teeth free hand onto white card stock and cut them out. I traced either a penny or a nickle (can't remember now) onto red card stock for the eyes, and used a silver sharpie for the pupils. I cut a strip of blue card stock so that the edges were a bit wavy/not perfectly straight, then free hand drew the fabric drape lines with a black permanent marker, using the image original as a guide. I attached everything with a glue stick, then drew on the details (eyebrows, facial lines, collar bone lines, foot lines) first lightly with a pencil, then with a silver Sharpie. I then erased all stray pencil marks. I debated cutting it out, so that the figure stood alone and without the black background, but I decided not to. I could not be more thrilled with how it turned out!
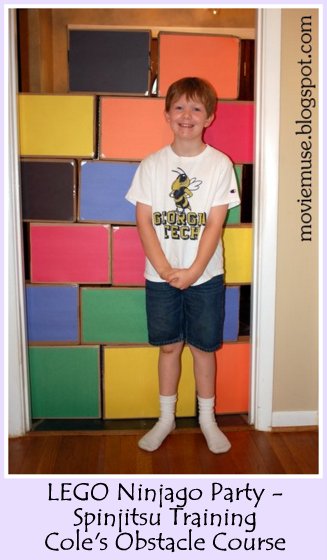
Cole's Ninja Obstacle Course - This idea came from Craft Interrupted. Again, I really did my own thing, but just the idea to do an obstacle course for ninja training made so much sense. Most of the ideas (army crawl, crab crawl, stairs) came from various recent Cub Scout activities. They did an obstacle course at the pack meeting a few weeks ago, and running through huge walls of boxes was part of it. I knew we couldn't do anything on that scale, but I do have quite a box collection in the basement. The boxes needed to be small and very light for the smaller kids kids. I discovered that we had a ton of the 1A3 size Amazon boxes, which are about 9x12x3 inches (and I think we used a few of the slightly larger 1B2 boxes on the bottom). When stacked, they really reminded me of LEGO bricks, so we taped construction paper (just one sheet; it was the perfect size already!) to the bottom of each box to enhance the LEGO brick effect. My husband and his uncle reset the boxes for each kid. I didn't get to actually see any of them go through the wall, but I hear there was some hesitation for most kids. Still, they all did it and had a ball!
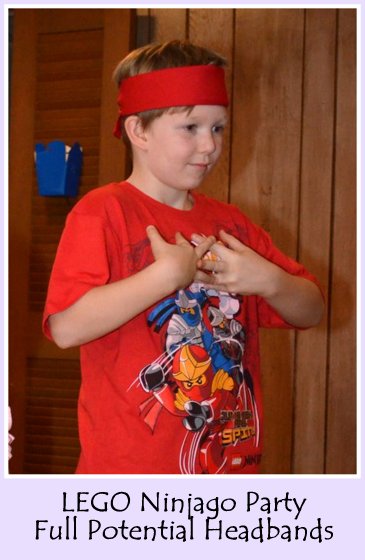
Again, the final test was *supposed* to be each kid breaking a balsa wood board, but I got sidetracked, so only the birthday boy and my nieces got to do it. It was still great fun! The idea for the headbands also came from Craft Interrupted. I used $0.99 solid red "bandanas" from Hobby Lobby.
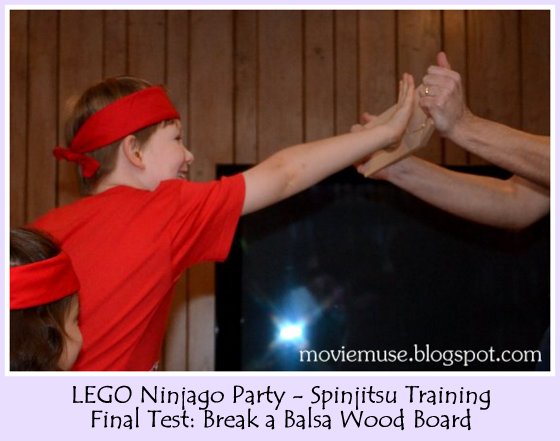
The balsa wood also came from Hobby Lobby and Michael's. Be sure you are buying balsa wood, not bass wood; they are often held in the same display and can get mixed up with each other. I bought them 3 inches wide by 36 inches long, and cut each sheet into three 1-foot pieces (just used heavy duty scissors). I decided on 3/16 inch thickness for most of the kids. The older kids probably could have gone with 1/4 inch, but I wanted something to work for all the kids (or almost). Even my 4 year old niece did 3/16 inch successfully. For the youngest kids, I did purchase a 1/16 inch piece, just in case, which turned out to be a good thing, since that's all my very small 2 year old niece could manage, but she was so very proud of herself! Be sure that you remind the kids they should *only* try this with special ninja testing boards (i.e. balsa wood). They should not go around trying to Miss Piggy hi-ya everything in site. They could seriously damage their hands.
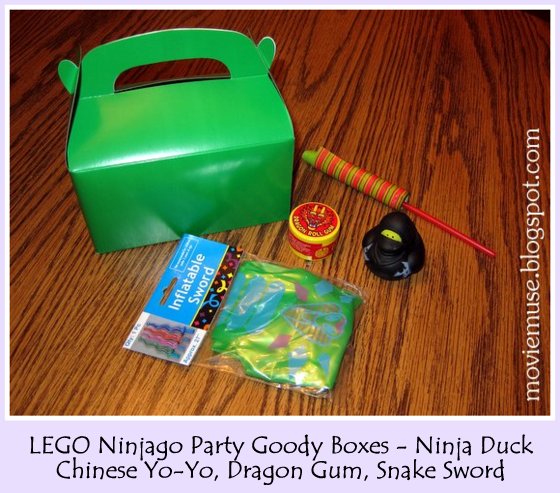
For the goody boxes (which should have had ninja eyes on the sides, but I didn't get to it), I included the following, all from Oriental Trading Company:
* Chinese Yo-Yo
* Ninja Rubber Duck
* Dragon Roll Gum
* Inflatable Snake Sword
The treat boxes are also from Oriental Trading. If I hadn't completely forgotten about it, they also would have included a fortune cookie (I didn't mind buying a few, but we would have needed about 50 for the take out container toss game) and an origami ninja star. They would also have gotten to keep their headbands, if we'd remembered to give them out.
So that's it! If you have any other questions, please let me know. erinmarie AT rocketmail DOT com
>So many great ideas - awesome!! I confess I'm not a huge fan of the ninjago story line but by son LOVES them and spends hours creating stories with the figurines and building legos and that's what he wishes for his birthday party theme so i'm trying to pull it off :) thank you for sharing your ideas!
ReplyDeleteHI! FYI- Walgreens will not print the posters. I even took in screen shots of the website where you get them and they said I needed a written statement of release. ~ Lindsey
ReplyDeleteYou are very talented and a good mother thanks for the post
ReplyDeleteGreat ideas- will definitely be using some of them! I downloaded, installed, verified (everything) the Wonton font but still cant access it in Word. Any tricks I'm missing?!? Please help! THanks!
ReplyDeleteThank you so much for the great ideas! My little guy is very into Ninjago, he is going to be so excited, and I love a project!
ReplyDeleteThank you! I had no idea that Lego had free printable Ninjago posters until I read your post! My little boy's 9th birthday is going to be based on your ideas.
ReplyDeleteOMG. Your post was such and awesome resource for my ninja party planning! Thanks! http://www.child-bearing-hips.blogspot.com/2013/12/cams-birthday-part-2.html
ReplyDeletegreat post. thanks for sharing. love the ninja ideas!
ReplyDeletehere to read about my son's LEGO Ninjago Birthday Party. Because there are no commercially produced LEGO Ninjago party decorations, we had to ... xlegoninjago.blogspot.de
ReplyDeleteLoved watching these photos from Lego party. My son loves Lego parties. Even planning to have this theme in his upcoming birthday party. Will be hosting this event at a local party venue NYC. Hoping to arrange a perfect party.
ReplyDelete